How to Render Beautiful Text for your UI library (Part 1)
In the last article, we talked about how we can render rectangles. How about using rectangles? Let's start directly by giving you a version of this rectangle that can be used to render textures:
float4 PSMain(VSOutput input) : SV_Target {
    float clip = ClipCoverage(input.pos.xy);
    if (gPush.mode == 0u) {
        float a = gTex.Sample(gSampler, input.uv).r; // coverage mask
        return float4(input.col.rgb, input.col.a * a * clip);
    }
    float4 c = gTex.Sample(gSampler, input.uv) * input.col; // RGBA, modulated
    return float4(c.rgb, c.a * clip);
}
We will talk about the mode later, but just know mode!=0 is for normal textures. Also, I removed the SDF rounding for simplicity.
Fonts
Everyone has seen a font file once in his life, but not everyone knows what's inside it. A Font file literally contains the following:
- The Shapes (Glyphs): The bezier curves used to draw a character
- Glyph Metrics: How much space a letter occupies
- Layout Rules (Ligatures): Like, for example, how to combine characters. In Arabic, there is a letter هاء which is written like this ه, but can be written differently if it is at the start of the word, like هواء, or at the end of the word, like وجه. As another example, in English, when letters like f and i are next to each other, they can be combined into a single shape fi so the dot of the i doesn't crash into the top of the f.
- Glyph Mapping: It's what this glyph maps to. Usually a 1-to-1 mapping, except in specific cases like the ones mentioned above
We mentioned a Glyph above, but never defined it. If you are smart, you will notice that a Glyph means a character. That is correct, but it is not completely accurate. You see, a and A are the same character to us, but they are written in two different ways. Another example is what we talked about above in layout rules: fi, which takes on a unique shape when the two letters are written together. Therefore, each has its own Glyph. As mentioned before, a glyph is simply the set of curves used to draw a character.
How Are Fonts Rasterized?
We will use the FreeType library for that. Let's start simple. We will split a word into characters, and look up the corresponding glyph for each one. We can use FT_Get_Char_Index. This simple function returns the glyph index in the given font face.
Using this glyph index, we can get a bitmap texture of how this character will look on screen using FT_Load_Glyph. Inside this function is where all the magic happens. It converts these curves into an image, but how?
As mentioned above, Glyphs are stored as curves, with particular coordinate points representing the curves. Check the Scan Line Converter By FreeType for more information. It will explain how it's done way better than I could. But in simple terms, it rasterizes an image row by row.
As shown in the example above, a glyph is a set of points (main points and control points) which create polygons, and the Scan Line basically just fills them in (with some math optimisations to avoid aliasing of course),
You may ask, why don't we do this on the GPU? If you think about it, it's a great question, but there are some caveats. Let's talk about the easiest approach: convert curves to vertices, then draw them in a single draw call. That will be a bit heavy even with caching. Another approach is to rasterize it through a compute shader. Even on paper that's a good approach, but there is an issue: the compute shader approach already exists as an enterprise algorithm called Slug. So why don't we use it? This algorithm is so complex and so expensive that it's usually only used to render text in 3D, where the text needs to be big, clearly visible, and smooth.
Note that from this point I will talk about how I did it. Maybe it's not the most optimal solution, but it works great for me.
As I mentioned, each glyph has its own texture, but uploading all of this to the GPU as individual textures is very expensive. I built a glyph atlas that both the backend and the font manager agree on. The Font Manager defines an atlas with a width, a height, and a pointer to its pixels. Something like this:
class GlyphAtlas {
public:
    struct Slot {
        int x = 0;
        int y = 0;
        int w = 0;
        int h = 0;
    };

    GlyphAtlas(AtlasFormat format, int width, int initialHeight);
    ~GlyphAtlas() = default;

    void Reset();

    const Slot* Add(std::uint64_t key, const std::uint8_t* pixels, int w, int h, int srcPitch);
    [[nodiscard]] const Slot* Find(std::uint64_t key) const;

private:
    bool Reserve(int w, int h, Slot& out);

    AtlasFormat _format;
    int _bpp;
    int _width;
    int _height;

    std::vector<std::uint8_t> _pixels;
    std::unordered_map<std::uint64_t, Slot> _slots;
};
We split this atlas into slots. We do not know how many slots the atlas will actually hold because it handles glyphs of all different sizes.
Previously, we talked about the load glyph function. Let's add it to the atlas. But first, let's talk about the Atlas Format. You see, FreeType's rasterized textures come in different types, but we only care about two of them:
FT_PIXEL_MODE_GRAYused for most glyphs like the text you're reading right now. We call this AtlasFormat::Coverage because it has a single channel that tells the GPU how white this pixel is.FT_PIXEL_MODE_BGRA: for things that are already colourful glyphs, like emojis 🚀 👾. We call this AtlasFormat::Color because it's just a colourful texture.
Keep in mind something about the Coverage format: the pixels vector is just $width \times height$. For the Color format, it's $width \times height \times 4$, where four is the number of channels, RGBA in a pixel.
Keep in mind also that we have two atlases, and both are used simultaneously and defined together so they do not interfere with each other.
That's still just a CPU texture. Let's upload it to the GPU. Assuming the atlas already exists, we do partial uploads by marking the areas that are dirty and uploading only those (I am not sure if your RHI supports it, but when I implemented my RHI, I kept that in mind).
How to render all that?
Let's have a real example: "Hello World! 👋" This example has two different kinds of glyphs.
Coverage , which is "Hello World!" , is stored in the coverage atlas. When requested, we render it as a whole batch in a single draw call that contains all the vertices. Each vertex has its own position on the screen, the UV coordinate to fetch the needed glyph from the atlas, and the tint color.
Te final code will be like this
float4 PSMain(VSOutput input) : SV_Target {
    float clip = ClipCoverage(input.pos.xy);
    if (gPush.mode == 0u) {
        float a = gTex.Sample(gSampler, input.uv).r;
        return float4(input.col.rgb, input.col.a * a * clip);
    }
}
where input.col here means the tint color, we talked about clip coverage before, and the output is the tint colot but we control how visible the character from the coverage (gray) channel.
Tint here means change the color of the glyph
Color, which is the 👋 emoji, is not any different from Coverage, except that we add the texture's full set of channels into the equation, like this:
float4 c = gTex.Sample(gSampler, input.uv) * input.col; // RGBA, modulated
return float4(c.rgb, c.a * clip);
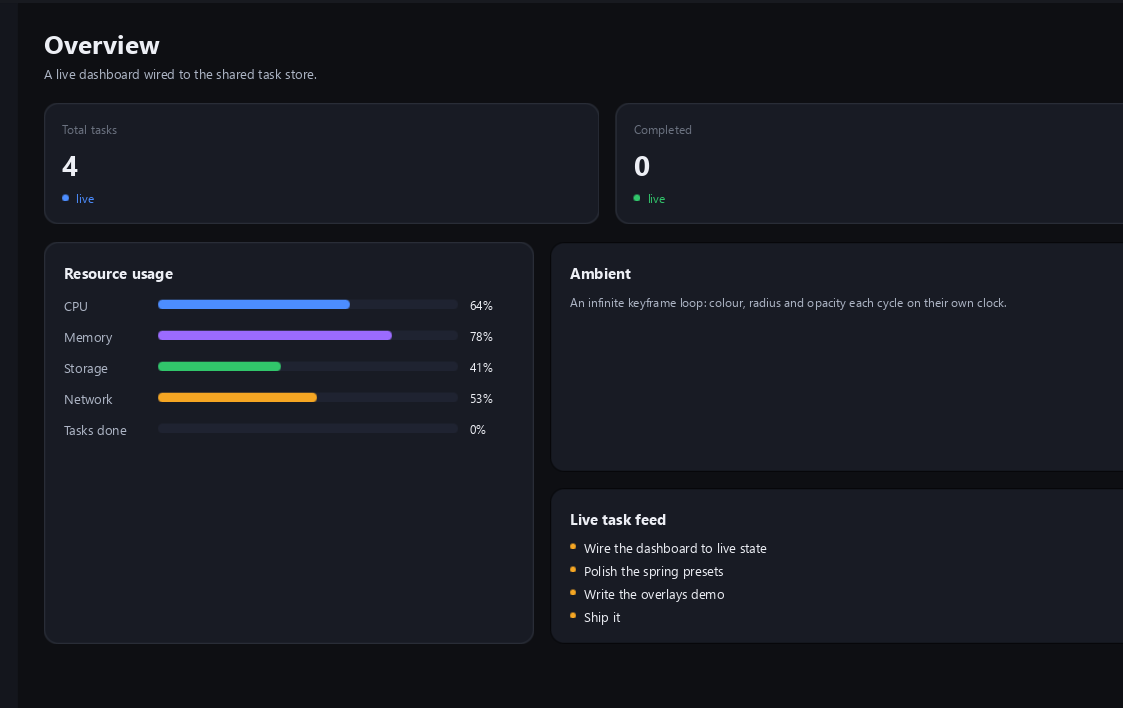
That's a screenshot of a demo in my UI framework. It looks magnificent don't you think
Now we talked a lot on how we rasterize glyphs. But we were only assuming Glyph = Character. That's not always correct as mentioned before. We need to do shaping. For this, we will use HarfBuzz which is an open source text shaping engine.
Let's define first a term called Codepoint. Codepoint is number Unicode assign to one abstract character.
Ex: "A" = U+0041 (65 decimal). "€" = U+20AC. Emoji 😀 = U+1F600.
HarfBuzz
HarfBuzz, as mentioned, is an open source text shaping engine, but what does this fancy term mean?
HarfBuzz answers a very simple yet important question: given a font, the codepoints of a paragraph, and the language being used, which glyphs will be drawn? In other words, it handles ligatures.
How does it work under the hood?
Before it shapes anything, it needs some context to work with:
- The Font: The font that used to render the text (Same font used in FreeType)
- The Direction: HarfBuzz needs the direction of the text, whether it's LTR (Left to Right) or RTL (Right to Left)
- The Script and Language: two separate settings, because shaping rules are script-specific. Latin, Arabic, Devanagari, and Han text all get shaped by different logic under the hood, and the language tag refines those rules further.
Step 1: Init HarfBuzz
We already parsed the font file via FreeType. Now, we need to use it as a read-only font face inside HarfBuzz
struct FontSpec
{
    std::string family;
    bool bold = false;
    bool italic = false;
};
struct Face{
    std::vector<std::byte> data;
    FT_Face ft = nullptr;
    hb_blob_t* blob = nullptr;
    hb_face_t* face = nullptr;
    hb_font_t* font = nullptr;
    FontSpec spec;
};

....

face->blob = hb_blob_create(data, size, HB_MEMORY_MODE_READONLY, ...);
face->face = hb_face_create(face->blob, 0);
face->font = hb_font_create(face->face);
Where data is the raw binary of the font file.
Now the per text init. We will define the font scale and font PPEM (Pixel Per EM)
hb_font_set_scale(face->font, px * 64, px * 64);
hb_font_set_ppem(face->font, px, px);
hb_buffer_clear_contents(shapeBuffer);
In PPEM, we set the nominal size of the font in actual pixels.
Now the tricky part. Why did we multiply the pixel scale by 64? Computers often handle decimal points roughly or slowly in graphics. To avoid this, typography systems use a format called 26.6 fixed-point math.
We also remove the content of the shape buffer to avoid creating it for every text. So, we keep reusing it.
Step 2: Use the Shape Buffer
Before we talk about all of that. When I implemented my UI framework, I decided to go with UTF-8 at first because it supports so many languages including Arabic (which is my main language) and it works well. In practice, HarfBuzz supports UTF8, But we are using the UTF32 implementation because we are using other libraries like SheenBidi needs UTF32 (We will talk about it later).
We will decode the UTF-8 string into an array of codepoints. What is decoding, and why do we need it?
UTF-8 varies in size. For example, ASCII characters are 1 byte, but Arabic characters or emoji take 2-4 bytes. So, DecodeUTF8 walks the string byte by byte, but it needs to know, at each step, how many bytes the current character actually takes before it can move to the next one. It does that by looking at the very first byte of each character: UTF-8 encodes the byte count right into the leading bits.
- If the byte starts with 0, it's plain ASCII — one byte, done.
- If it starts with 110, that's the first byte of a 2-byte sequence.
- 1110 means a 3-byte sequence.
- 11110 means 4 bytes, and this is the range emoji live in.
Once it knows the length, it pulls the meaningful bits out of the leading byte, then reads the remaining bytes (which all start with 10, marking them as "continuation" bytes) and folds their bits in to reconstruct the full Unicode codepoint — a single uint32_t number that represents that one character, regardless of how many bytes it took to encode.
The output of all this is two arrays: the decoded codepoints themselves, and a second array that remembers, for each codepoint, which byte offset it started at in the original UTF-8 string. This allows us to map back to the original text later if we ever need to.
void DecodeUtf8(std::string_view s, std::vector<std::uint32_t>& out, std::vector<std::size_t>& bytes)
{
    out.clear();
    bytes.clear();
    out.reserve(s.size());
    bytes.reserve(s.size() + 1);

    const std::size_t n = s.size();
    for (std::size_t i = 0; i < n;)
    {
        const std::size_t start = i;
        const auto c = static_cast<unsigned char>(s[i]);
        std::uint32_t cp = 0;
        int extra = 0;

        if (c < 0x80)
        {
            cp = c;
            extra = 0;
        }
        else if ((c >> 5) == 0x6)
        {
            cp = c & 0x1F;
            extra = 1;
        }
        else if ((c >> 4) == 0xE)
        {
            cp = c & 0x0F;
            extra = 2;
        }
        else if ((c >> 3) == 0x1E)
        {
            cp = c & 0x07;
            extra = 3;
        }
        else
        {
            out.push_back(0xFFFD);
            bytes.push_back(start);
            ++i;
            continue;
        }

        if (i + static_cast<std::size_t>(extra) >= n)
        {
            out.push_back(0xFFFD);
            bytes.push_back(start);
            break;
        }

        bool ok = true;
        for (int k = 0; k < extra; ++k)
        {
            const auto cc = static_cast<unsigned char>(s[i + 1 + static_cast<std::size_t>(k)]);
            if ((cc & 0xC0) != 0x80)
            {
                ok = false;
                break;
            }
            cp = (cp << 6) | (cc & 0x3F);
        }

        if (!ok)
        {
            out.push_back(0xFFFD);
            bytes.push_back(start);
            ++i;
            continue;
        }

        out.push_back(cp);
        bytes.push_back(start);
        i += static_cast<std::size_t>(extra) + 1;
    }

    bytes.push_back(n);
}

// ...

std::vector<std::uint32_t> cps;
std::vector<std::size_t> cpBytes;
DecodeUtf8(text, cps, cpBytes);
We can use the output later via
hb_buffer_add_utf32(shapeBuffer, cps.data(), n, 0,length);We continue with more configuration
hb_buffer_set_direction(...);  // We default to LTR, or you can make it configurable
hb_buffer_set_script(...);     // from the run's Unicode script
hb_buffer_set_language(...);   // system default
Step 3: Shape It and Read the Results
Now, the most important step: run the shaping engine and read the results back.
hb_shape(rf->font, shapeBuffer, nullptr, 0);
int length; // glyph count
const hb_glyph_info_t* info = hb_buffer_get_glyph_infos(shapeBuffer, &length);
const hb_glyph_position_t* pos = hb_buffer_get_glyph_positions(shapeBuffer, &length);
From these outputs, we get the following information:
info[i].codepointdespite the name, this is the glyph index in FreeType glyphs arraypos[i].x_advance, y_advanceHow much the line advances after drawing this glyph when setting this glyph in horizontal/vertical line.pos[i].x_offset, y_offsetHow much the glyph moves on x and y axis before drawing it (That's in local coordinates where the first glyph rendered in (0,0) )
Remember, above we were multiplying the scale by 64. Now we have to divide by it to undo the 26.6 fixed point. We do it for both the advance and the offset.
Maybe all that didn't sync up together for you, right? Let's sync it up. Here is what happens in order, how, and why:
- We load a font, store its bytes in a vector, and load it into both FreeType and HarfBuzz.
- When we want to display text of any size, we measure it first to know how much space it will need, by doing the following:
- Decode the UTF-8 string into codepoints
- Pass the decoded codepoints to HarfBuzz, along with other options like language, direction, and scale
- From HarfBuzz 's output, we can calculate how much space will be needed to render this text
- Cache the output to avoid recalculating it, since it will also be used during rendering
- After measuring, we load the glyph indices from the cache and rasterize them via FreeType.
- We take the output bitmap and store it in an atlas of the matching format (Coverage or Color)
- We build a batch of quads to draw into a single draw call. Each vertex has the absolute position on screen, its UV coordinate from the atlas, and a tint color if needed.
- If the atlas, or parts of it, are dirty, we upload the dirty parts to the GPU
- Bind vertices + indices of this batch and call DrawIndexed
And that's it people. Cheer up, now we have basic anti-aliasing, optimized text rendering (I guess). In the next article, we may talk about how I use other libraries like SheenBidi to figure out which parts of the text are LTR and which are RTL, and libunibreak to work out where a line is actually allowed to break.